Thursday, 6 June 2013

Maintain vendor credit memo
For maintain the vendor credit memo you will have to the task menu then select the option of vendor credit memo.
Like this:-
                                                

After selecting the vendor credit memo following window will appear:-
                        

Vendor id: You should mention the vendor id here to whom you want to maintain credit memo.
Date: You should mention here date on which you make vendor credit memo.
Credit No: Serial credit no should be entered here.
Term: The business credit term should be entered here.
Quantity: Product quantity mention here.
Item: Nature of item select from here.
Unit price: Unit price of the item should be mention here.

After providing the whole above mention information you must be save every thing from the top of the software window.
Like this:-


Thursday, 30 May 2013


Sales Quotation

Sales quotation made for providing the sales price and quantity information for specific time period to customer of the company. We can say that the total details about the product are mentioned in sales quotation.

How to make sales quotation

To make sales quotation in Peach tree accounting software first open your company then move your cursor to tasks tab located on the top of the window and click on it. After that you move your cursor on the first option “Quotes/Sales order” and then select the “Quotes” option.


Like this:-


After applying the above procedure you will get following window. Here you provide the whole information of specific product for specific time period.


1-     Customer I D:-
You should select your customer id to whom u want to send quotation.

2-      Date:-
Here you will mention the date on which you made the quotation.

3-      Good Thru:-
Here you will mention the date up to this quotation is valid.


4-      Quote No:-
Here you should provide the serial quote no of quotation.

5-      Quantity:-
Here you will provide the quantity of the product.

6-      Item:-
Select the item you want to sale.


After provide all of these of thing you should move your cursor to save tab located on the top of the software windows.


Friday, 17 May 2013


Payments to vendors and creditors
 For making payments to vendors and creditors you will have to open the task option then select payments from this window after that you can see the following screen


Then by selecting the payments options you will see the window of payments like this


You will have to fill the vendor id , name , date , quantity description all the regarding information you will have to will then save it..

Thursday, 16 May 2013

Purchase Order and Purchases received


PURCHASE ORDER
To make a purchase order first you move your cursor toward task tab located on the top of the software windows:-
          

And then you select the purchase order option showing as above.


After selecting the purchase order option from the tasks bar you will get the following window.


Here is the purchase order window from where you make order to you vendors.
For the purpose of making the order. You should select your vendor from the vendor id tab:-


Select the vendor id by pressing look up button you should enter the other data.
Very compulsory step is to enter PO no.
`                 


Here you enter the PO no. and then proveide other data like qauntity, item type ,GL account and than press the save button located on the top of the winodow or press Alt key and S togathrly.


PURCHASES/RECEIVED INVENTORY

For the purpose of purchase received inventory you will follow the following steps.
1-     Selecting the tasks tab located and top of the Peachtree software windows and after that select the purchase received option.


When you select the option of purchases received you will get the following window:-
          

Here you enter the vendor id than you should provide the invoice no. than sect the PO no. after all of this work press the save button located on the top.

Thursday, 11 April 2013


How to maintain vendor
For maintaining the vendor you will move your cursor toward the maintain bar located on the top of the window and then left click on the “maintain” bar after that you will select the second option (vendor).

After selecting the vendors..You will get the following windows for the purpose of maintaining the vendors and where you provide the information about the vendor of the company.

Here you should provide the information of the vendor of the company for maintaining the vendor. You should provide the vendor id and name .This is the general tab of the vendor maintaining. Here you provide the vendor contact information, account number address, city, zip code and country.etc….
After provides these information about the vendor you can move the next tab of the maintain vendor windows. Which is as follow:-

Here you can provide the purchase information about the vendor like tax id, shipment information purchase rep but you must be able to provide the purchase account id like inventory id is (120).
Now you should move toward the next step of maintaining the vendor which is the next tab of the vendor account is customer fields:-

Here you can set the customs field name. This is for the purpose of setting the customer field’s name.
After this the next tab of maintain vendor is history:-

This window is for maintained the history of the vendor here you can provide the information of the vendor history to the software like purchases, payments etc…
After all you can save all the data provided to the software about the vendor. By pressing the alt key and “s” key jointly or by pressing the “save” tab located on the top of the maintain vendor window.

Maintain default setting of the vendor
For maintaining the default setting of the vendor first you move your cursor towards the maintain tab located on the top of the main screen:-

After selecting the main you should move to the third last option which is default information after this you can reach to the vendor and select the vendors… option. As the above picture tell.
After selecting the vendor option you can get the following window:-

In the vendor default setting you can enter the default data about the vendor the company.
You can provide information about the aging, customer fields and settings etc.
Here you should provide the purchase account id like (120) shown in the above picture.


Friday, 5 April 2013


How we will maintain chart of accounts

After creating a company we will maintain chart of accounts. To make chart of accounts open Peach tree software and choose the option of open an existing company following wizard will appear.


To make chart of accounts select maintain from the tool bar and click on it. Select chart of accounts from the maintain menu to proceed.

By clicking chart of accounts following screen appears. In this window you have to type account id, account description, account type. After filling all the fields click save to move forward.

 
HOW TO MODIFY CHART OF ACCOUNTS
While making chart of accounts there could be a wrong entry. To modify that wrong information click on look up button

By clicking the above button you can alter account type and account description


To change account id click the change id button following screen will appear here you can change account id by typing the right account id.


Thursday, 28 March 2013


How to maintain a customer/Prospectus
After set up a company and charts of account we need 
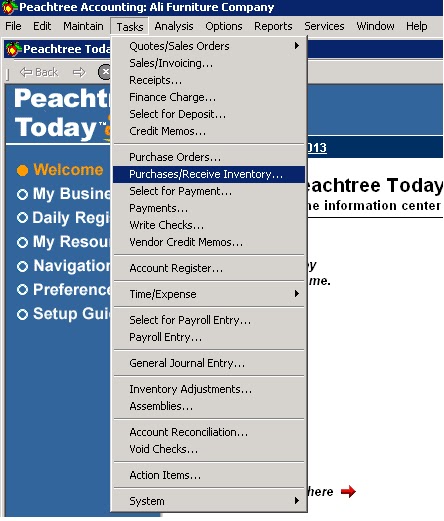
to make subsidiary ledgers for accounts receivable. For this purpose we should 
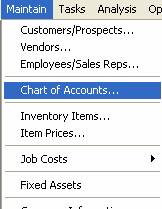
use the option of maintain appears on the 3rd option on the top left of the peach tree software. And select first option of customer/prospectus.

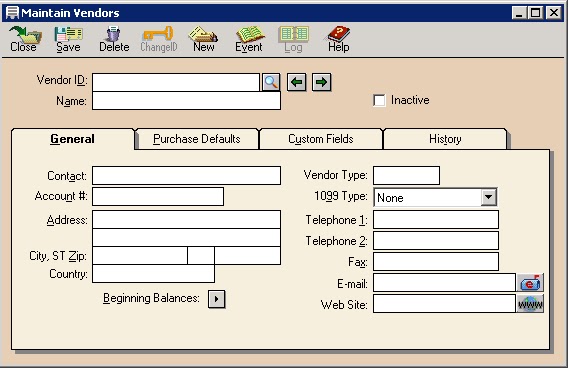
After selecting the first option you get the following window where u enter the customer id, name, address , telephone and other information of customer.
General Tab

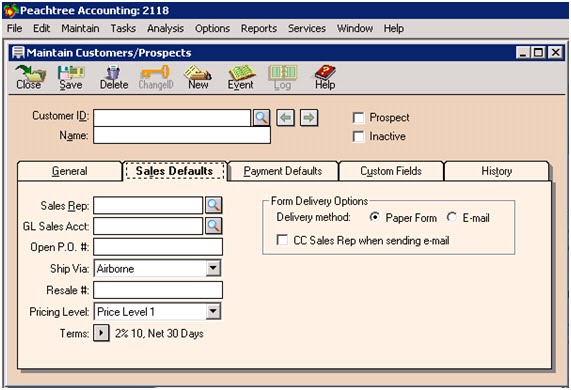
After writing all of these information you should move towards sales defaults tab located right of the general tab.


Here you will enter the sales representative for the make a contact between company and customer. And you must enter the general ledger account for the customer. And fill other requirement like open P.O number etc.
After providing the sales default information of the customer you will move towards the next option which is payment defaults.

This option is for the credit card. If your customer use credit card for the transaction you can enter the there information regarding to the credit card of you customer here.
After that the next option is customer Fields appearing as follow:-

Here you can enter the other contact information about the same customer, reference and mailing list etc.
The next and the last option are:-


Here you can check the history about the customer and all past transaction of the customer.
After all work you should save this from top left second option of the appearing window:-
How we will maintain default information of customer
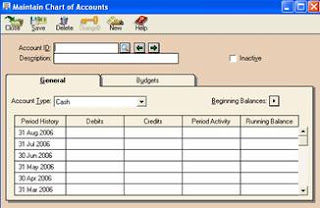
For the purpose of maintaining the default information of the customer first you click on the maintain option locates on the top of the windows. then you will get types of tabs and click on the default information and then on customer. then you will get the following widows:-

after click on the customer you will get the following information:-


then click on payment tab and fill all the default information of the customer here are different types of options like C.O.D , prepaid, due in  number of days due on day of next month, due at the end of the month at the last standard term is due at the end of the month this is for if you want to get amount of sales of the month after that at the end there is GL link accounts.:-
after that click on account aging tab you will have 2 types of invoices by:-
invoices date and due date:-